Tuesday, May 26, 2009

More fun with Alcohol Inks

I learned a very cool technique recently and have been having lots of fun experimenting. I created a card using Heidi Swapp ghost shapes (Thick clear plastic that comes in a variety of shapes and sizes), alcohol inks, and archival black dye ink.

First I inked up my butterfly (Heidi Swapp XL Ghost Shape) with cranberry and butterscotch alchol inks. I set it aside for a few seconds to dry. Then I inked up a flourish stamp with black archival dye ink (you have to use archival ink or this won't work). I stamped my flourish onto my butterfly and then immediately wiped the black archival ink off with paper towel. Wherever the archival ink was, it picked up the alcohol ink and left a clear impression of the flourish stamp. The rest of the butterfly was left untouched because the alcohol inks were already dry and set to the plastic. To enhance the image I outlined it with stickles. Pretty cool eh?!

I cut out my sentiment using the Cuttin Up cartridge with the serif function. The swirl behind the butterfly was cut using Graphically Speaking. I added some stickles to the cuts for added sparkle and to bring out the stickles on the butterfly.

The white background paper was embossed with the swiss dots cuttlebug folder.

I highly recommend this technique it is fun, easy, and very eye catching. Just be sure to use archival ink and a fat solid image for the best results.

Fun with Alcohol Inks!

Hi All,

I thought I would share my latest creation with you. I just finished decorating a metal tin for a friend's birthday. It was very simple to make. Once I had inked up the tin I cut out the word treasure and the flourish from the Graphically Speaking cartridge. The flourish has been stretched and flattened using Cricut Design Studio. I stamped the butterfly, cut it out and then covered it with glossy accents for dimension. I also added some stickles on the word and flourish for a little sparkle.

The two colours of alchol ink I used were Stream and Cloudy Blue.

Enjoy!

Friday, May 8, 2009

How to make your picture flow into your title!

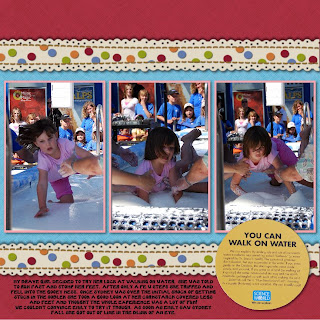
I was checking out the Creative Memories digital site today and they had a little tutorial on how to create the coolest title. I had seen this type of title before but never knew how to duplicate it. I thought I would give it a try and it worked! I am so pleased with my two page spread. It is very simple but I think the title really packs a punch.


In order to get your picture to flow over into your title you need to create a title using a very chunky font. Make the font size big enough to spread across your page and move it so it is touching your picture. The picture you choose should be one that the focal point is in the centre of the frame.

With your title selected right click and choose flatten from the drop down menu. Then select your picture while holding the shift key (your picture and title should both be selected). Right click again and select flatten. Now you can see on your left hand ribbon that the picture and title are now one element.

Go over to your photo tool bar on the right hand side and right click on your original picture. A drop down menu will pop up. Choose "fill the selected element with photo". Now you photo should fill up the photo area as well as your title. Keep in mind that your picture will fill from the top left corner so if it is not merging like you had intended you may need to crop your photo.

Recipe:
CM storybook creator plus
family digital kit
scalloped border was a freebie from the CM digital site

Saturday, May 2, 2009

NSD Challenge #5

I just finished challenge 5 over at the pink stamper. The challenge was a sketch challenge. I didn't have any pictures printed so decided to go digital with this one. I really like how it turned out. I don't normally scrapbook one photo per page so this was a bit out of my comfort zone.

Here is the sketch that was given on http://thepinkstamper.blogspot.com


Here is my interpretation. This was done using Creative Memories storybook creator plus but all of the elements are free elements I found online.


NSD Challenge #2

Hi Everyone,

I just completed Challenge #2 over at http://thepinkstamper.blogspot.com . The challenge was to try something you have never tried before. Well I just purchased the martha stewart glue pad and some fine glitter to go with it. I decided to create a card that would include a stamped image using the glue pad and glitter.

I cased a card that I found over at splitcoast stampers and started to create. All I can say is if you were thinking of purchasing this product DON'T! I stamped my image and applied the glitter but it wouldn't stick. The glue pad came with a glue refill so I applied the refill and tried again. Still no luck. This glue pad is definitely not worth the money and I will be returning both the martha stewart glue pad and glitter first thing on Monday morning.

I still took a picture of my card so you could see the results for yourself. I also redid the butterfly image using SU rose red ink just so the card was presentable.

Enjoy


NSD Pink Stamper Challenge #1

Hi Everyone,

I have just completed Challenge #1 over at http://thepinkstamper.blogspot.com . The challenge was to create something using brown and a pastel.

I chose to do a spring card. Not only did I use brown and a pastel but I used a brand new stamp set as well. I apologize for the terrible picture. The colours are much better in real life.


Here is the recipe for the card:

Cardstock: SU chocolate chip, pink pirouette (textured), certainly celery, whisper white, patterned paper from DCWV nana's nursery baby girl

Ink: pixie dust and aloe vera versamagic chalk ink, SU chocolate chip

Stamp set: MSE Spring Tulips Sentiments

Happy National Scrapbook Day!

Hi Everyone,

I have been neglecting my blog lately and I apologize. I have been pretty busy. Well as some of you may know it is National Scrapbook Day today. The pink stamper is celebrating NSD with a ton of challenges and giveaways over at http://thepinkstamper.blogspot.com . I am going to try and participate in as many of the challenges as I can and share my creations with you.

I hope you enjoy my creations and perhaps they will get your creativity flowing. Everyone is welcome to participate over at http://thepinkstamper.blogspot.com so come and join in the fun.

Happy NSD everyone!