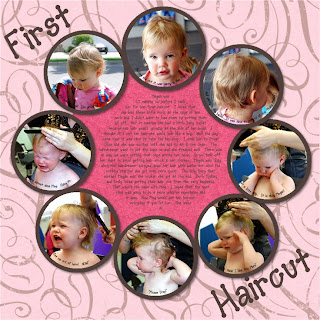
I created a layout this morning and played with some of the new text features that Storybook Creator 3.0 offers.
First off I used the free template that I found on the Creative Memories Digital Freebie Website. This is a fantastic site to visit and boost your digital content for free. Once I had the template I altered it to meet my needs. I didn't have as many photos as were in the template so I deleted some photo frames and enlarged the photo frames that were left. Another option would have been to fill some of the empty photo frames with patterned paper or used them as text boxes.
Next I decided to change my text box in the middle so the text would fill in an eliptical shape. To do this click on the "Format Text" ribbon. Select your text box and click on text shape. Now you have a ton of shapes to choose from. I chose the elipse so it would mimic the shape of the middle circle.
The other thing I tried was using the "Text Path" feature. To use this feature you click on the "Insert" ribbon on your tool bar. Select "Text Path". A dialog box comes up where you can choose how you want your text to flow. I decided to stay with the default option. Then you click anywhere on your page to create a path. I wanted my text to follow the circular path on each of my photos. I simply placed a few points at the bottom of my photo until I had the effect I wanted. Once you have the path you want click create and the path is layed out for you on the screen. If you aren't happy then you can select "edit path" and move your points around.
Now all you do is type your text and it will follow the path your created. I found that in my case my text wasn't centering so I just placed a few spaces in front of my text until it was placed where I wanted it.
The other new feature that I played with is the rubber stamping feature. I used the rubber stamping feature on my Earthly Serenity overlay. This gives a really neat rubber stamped effect to your image. To use this feature I added my overlay to my page. While the overlay was selected I right clicked and selected "rubber stamp" from the drop down menu. A dialogue box comes up and you can play around with the various options until you get the desired effect. When you are done click create and a rubber stamped version of your element appears on your page. I played around with the placement of this image and tried layering it over my original overlay for a pretty neat look. In the end I deleted my original overlay and just used my rubber stamped overlay.
I also played with the opacity of my rubber stamped overlay so it wasn't quite as intense.

Here is the recipe for the layout above:
Storybook Creator Plus 3.0
Creative Memories Earthy Serenity overlay #8
Creative Memories Freebie Template
All colours for this layout were sampled from Stampin Up colours (Melon Mambo, Pink Pirouette, Chocolate Chip (altered a bit), and Close to Cocoa. I will explain how to do this in a future post.
Happy Crafting,
Catherine


No comments:
Post a Comment